Contact Us
How To Install PHP 5.4 Using Yum On CentOS 5/6/7?
Introduction About PHP?
PHP is one the most used server-side programming language is the world. It is still most widespread and most popular server-side scripting language. Also, PHP is an open source web scripting language that is widely used to build dynamic web pages and web applications. Though it is not the best but, its modules and libraries made it so popular and really cut your programming time. It also communicates with databases like MySql and supported by web servers like Apache. Well, you will happy to know that YAHOO and FACEBOOK started with PHP and successful.
Scenario: My Server IP is 192.168.1.188
Note: If you are a SUDO user then prefix every command with sudo, like #sudo ifconfig
Step 1: Enable Remi Repository
The most of the updated package is available under Remi repository. Install it in your system using following commands.
CentOS/RHEL 7:
# rpm -Uvh http://rpms.famillecollet.com/enterprise/remi-release-7.rpm

CentOS/RHEL 6:
# rpm -Uvh http://rpms.famillecollet.com/enterprise/remi-release-6.rpm

CentOS/RHEL 5:
# rpm -Uvh http://rpms.famillecollet.com/enterprise/remi-release-5.rpm

Fedora 20:
# rpm -Uvh http://rpms.famillecollet.com/remi-release-20.rpm
Step 2: Install PHP With REMI
To install PHP type in the following command into your terminal
#yum --enablerepo=remi install php php-mysql -y
Here php-mysql is a module that PHP can communicate with the databases. After the completion of this command, PHP will be installed.
Step 3: Look For PHP Modules
As PHP is installed but your application may require a various module to process. Well, thanks to its developers that there is a wide variety of useful libraries and modules which you can add to your server. If you want to look for available PHP modules type in the following command:
#yum search php-
Your server will communicate with the repository and it will list all the available modules. And the output windows will look like this:
# yum search php-
Loaded plugins: priorities, update-motd, upgrade-helper
============== N/S matched: php- ===================
php-Raven-tests.noarch : Test suite for php-Raven
php-libpuzzle.x86_64 : PHP-5.4 extension for libpuzzle
php-Monolog.noarch : Sends your logs to files, sockets, inboxes, databases and various web services
php-Monolog-amqp.noarch : Monolog AMQP handler
php-Monolog-raven.noarch : Monolog Sentry handler
php-PsrLog.noarch : Common interface for logging libraries
php-Raven.noarch : A PHP client for Sentry
php-ZendFramework.noarch : Leading open-source PHP framework
php-ZendFramework-Auth-Adapter-Ldap.noarch : Zend Framework LDAP Authentication Adapter
php-ZendFramework-Cache-Backend-Apc.noarch : Zend Framework APC cache backend
php-ZendFramework-Cache-Backend-Libmemcached.noarch : Zend Framework libmemcache cache backend
php-ZendFramework-Cache-Backend-Memcached.noarch : Zend Framework memcache cache backend
Step 4: Install A module
If you have to install a specific module then you may type the following command
#yum install <Chosen Module Name>
Well, Congratulations! You with the completion of this part 3 you have successfully setup a LAMP environment.
Step 5: Start PHP
Now to check your installation you need to restart or reload your Apache server and MySql server to get PHP start (PHP will run automatically once Apache starts):
#chkconfig httpd on
#chkconfig mysqld on
#service httpd restart
#service mysqld restart
Step 6: The Final And Check Your Installation
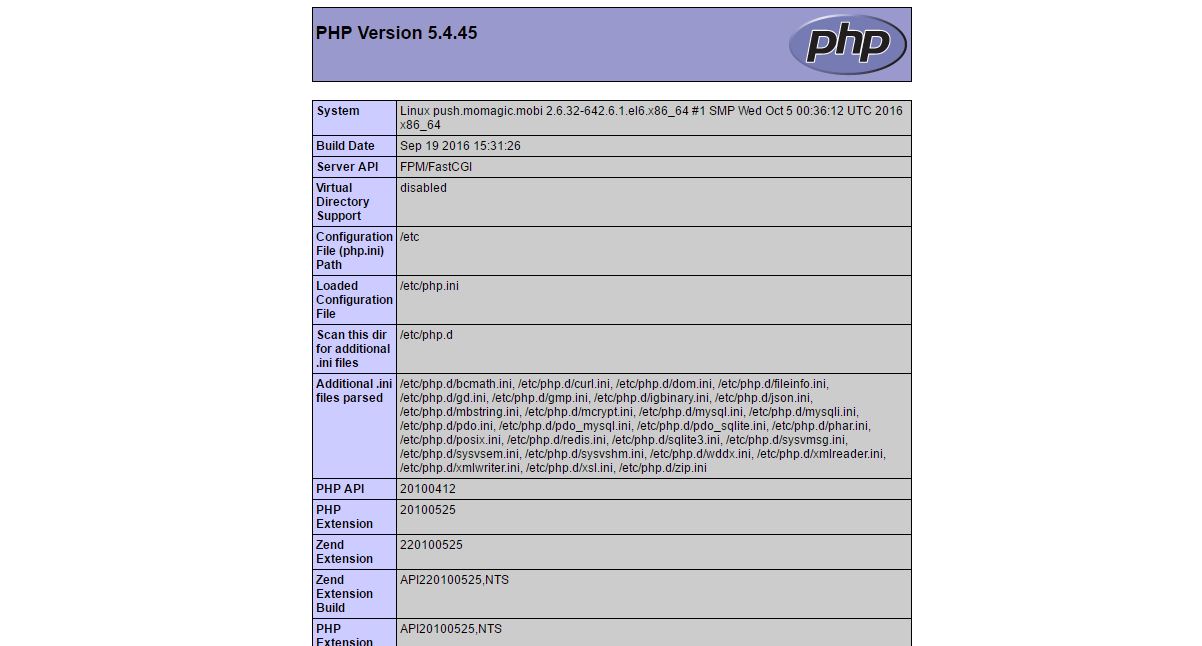
We have successfully setup LAMP environment and we can test this by creating a simple PHP file and calling a PHP function known as phpinfo(). So let’s create that file
#vim /var/www/html/info.php
Add in the following line:
<?php
phpinfo();
?>
Then Save and Exit by :wq!
Now Open your Web Browser and hit http://192.168.1.188/info.php
NOTE: Replace my IP address with your IP like http://YourIPAddress/info.php
If you can see a page like below then your LAMP is successfully setup and PHP is installed and working.
NOTE: Don’t forget to delete info.php page on a production server because it’s a security threat, as all your server details are open to the public.


Trending now