Contact Us

How To Install phpMyAdmin For Multiple Hosts On CentOS/RHEL/Ubuntu
In the previous article, we learned to install phpMyAdmin for single host only. But when there are multiple hosts or multiple MySQL servers, then sometimes we need to manage these several databases servers from a single place. Well by end of this tutorial you will be able to choose/connect/manage multiple databases hosts with phpMyAdmin. You will see a list of other databases hosts/servers in a drop down list.
When you install phpMyAdmin on your Linux/Windows systems, In most of the cases default installation dir is /usr/share/phpMyAdmin or /usr/share/phpmyadmin. But in the previous article of phpMyAdmin installation my dir was /var/www/html/phpmyadmin. You can do modify commands of this tutorial accordingly.
In This Scenario:
phpMyAdmin Server: 192.168.1.188
DB Host 2 server: 192.168.1.245
Note: If you are a SUDO user then prefix every command with sudo, like #sudo ifconfig
So Let’s start
Step 1. Configuration Changes.
Go to installation Directory of phpMyAdmin and make the following change, In your case, this directory location may be different.
# cd /etc/phpMyAdmin/
# cp config.inc.php config.inc.php-bak
# vim config.inc.php
Now add the following entries at the end of the file.
$i++;
$cfg['Servers'][$i]['verbose'] = 'DB Host 2';
$cfg['Servers'][$i]['host'] = '192.168.1.245';
$cfg['Servers'][$i]['port'] = '';
$cfg['Servers'][$i]['socket'] = '';
$cfg['Servers'][$i]['connect_type'] = 'tcp';
$cfg['Servers'][$i]['extension'] = 'mysqli';
$cfg['Servers'][$i]['auth_type'] = 'cookie';
$cfg['Servers'][$i]['AllowNoPassword'] = false;
Step 2: Allow phpMyAdmin in DB Host 2 sever
Now Login into DB Host 2 and run the following command in MySql terminal to allow phpMyAdmin server to access DB Host 2.
mysql> GRANT ALL PRIVILEGES ON *.* TO 'test'@'192.168.1.188' IDENTIFIED BY 'mmt@123';
Query OK, 0 rows affected (0.19 sec)
mysql> flush privileges;
Query OK, 0 rows affected (0.07 sec)
Here you should create your desired user with your defined password with your desired privileges. You can also manage their privileges. This step is a security measure because we don’t want anyone to log in with root user into MySQL Server.
Step 3: Check Your Work 🙂
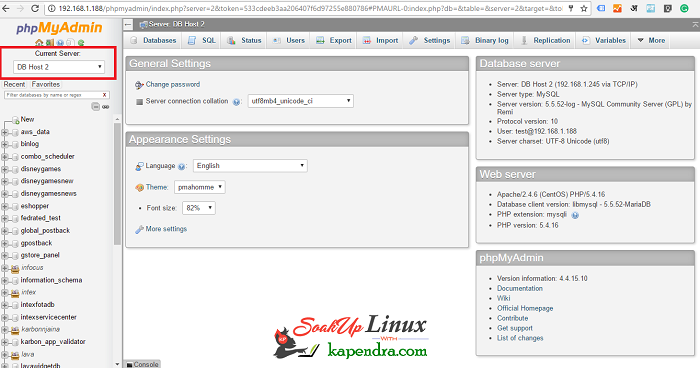
After this, as we have updated our configuration now we can access our phpMyAdmin in the web browser.
http://192.168.1.188/phpmyadmin
Step 4: Check Host List
Finally, you will see a drop down menu right beneath password text box. So now choose your host and type in your credentials which you created for DB Host 2.
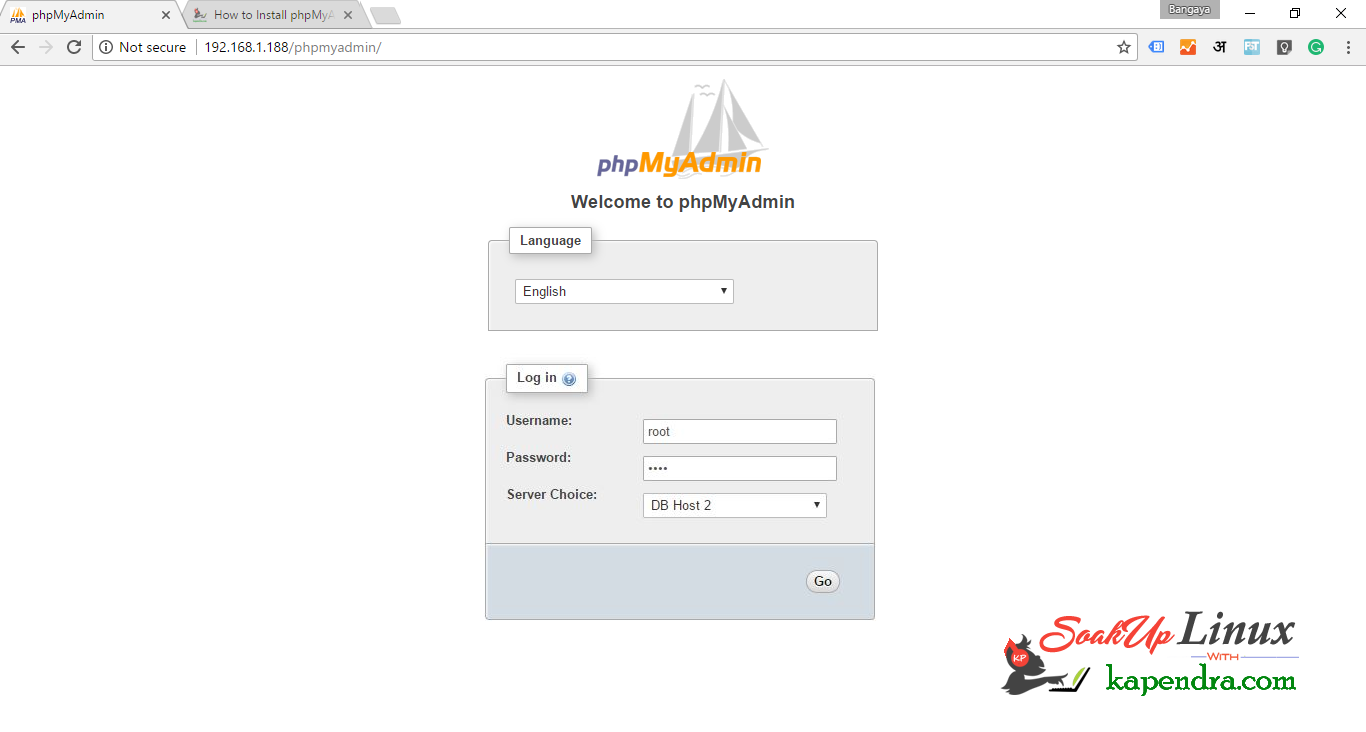
If you can see below picture then your installation is successful.


Trending now