Contact Us
How To Setup/Install Portainer Docker UI Manager?
In our previous article learned to setup local repository i.e. docker registry. Now if you somehow you are looking for open source GUI tool to manage Docker then the answer is Portainer.
It’s an docker management utility which provide a GUI for almost all kind of docker management. It is very lightweight and can manage different Docker environments (Docker hosts or Swarm clusters).
For this guide we will deploy Portainer as a Docker container on a Docker engine running on CentOS.
Why to use Portainer?
- Docker Image Management like push, pull, delete and Build images
- It leverages you to deploy applications very quickly from app templates
- Manages start, stop, kill, restart, pause, resume, remove and create containers
- Helps in Managing networks like adding, remove and edit network
- Provide Volumes management like add, remove and manage permissions
- Check docker engine events
- Helps you to Add custom docker registry and add authentication for docker hub
- Create endpoints
- Add users to manage Docker
- Manage Docker swarm
- Create custom container templates
Well we have got lots of point to go for Portainer but to deploy Portainer there are some prerequisite.
Some prerequisites are:
- A Running Docker engine – local or remote (local for this Article but you may use remote also)
- Any type of host machine as Linux, macOS or Windows
Our Scenario:
Host OS: CentOS 7
Host IP: 192.168.56.104
RAM: 4GB memory,
Network Port: 1GB/s
Storage: Mounted on /data
Hostname: registry.kapendra.local
Step 1: Create Persistent Storage
We need a directory on the host machine to persist container data. To do that create a directory that will hold all Portainer data.
[root@registry ~]# mkdir /data/portainer
Note : You can create directory at any choice of your location.
Step 2: Get Portainer Image
Let’s now pull Portainer the image from Docker hub and store it locally on docker host.
[root@registry ~]# docker pull portainer/portainer
Using default tag: latest
Trying to pull repository docker.io/portainer/portainer ...
sha256:07c0e19e28e18414dd02c313c36b293758acf197d5af45077e3dd69c630e25cc: Pulling from docker.io/portainer/portainer
d1e017099d17: Pull complete
d4e5419541f5: Pull complete
Digest: sha256:07c0e19e28e18414dd02c313c36b293758acf197d5af45077e3dd69c630e25cc
Status: Downloaded newer image for docker.io/portainer/portainer:latest
Let’s Tag this image with a custom name
[root@registry ~]# docker tag portainer/portainer portainer
Step 3: Bring Up Portainer Container
Let’s spin up the container now
[root@registry ~]# docker run -d -p 9000:9000 \
--restart always \
-v /var/run/docker.sock:/var/run/docker.sock \
-v /data/portainer:/data \
--name portainer \
Portainer
Now Check for container
[root@registry ~]# docker ps -l
CONTAINER ID IMAGE COMMAND CREATED STATUS PORTS NAMES
a381e3120b73 portainer "/portainer" 3 minutes ago Up 3 minutes 0.0.0.0:9000->9000/tcp portainer
Step 4: Create User Access Service
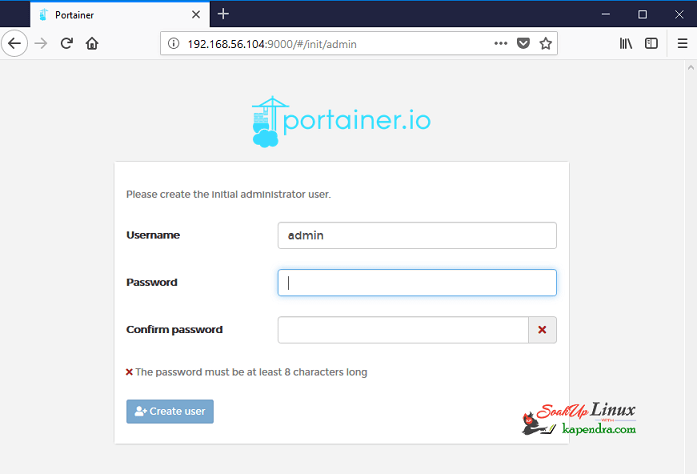
As our service is running , we need to create an user to access the dash board. so create a user assess below URL
Access on Browser: http://192.168.56.104:9000
You’ll be prompted to create an admin user so provide a password, then click create user.
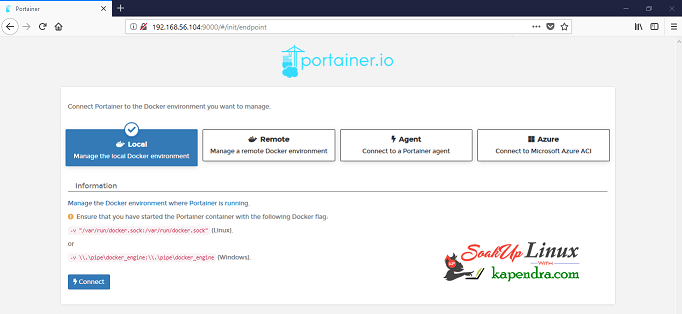
Now create docker environment can be local Docker engine or remote. For this article lets manage local docker engine.
Note : if some how you are not getting logged in then restart docker service.
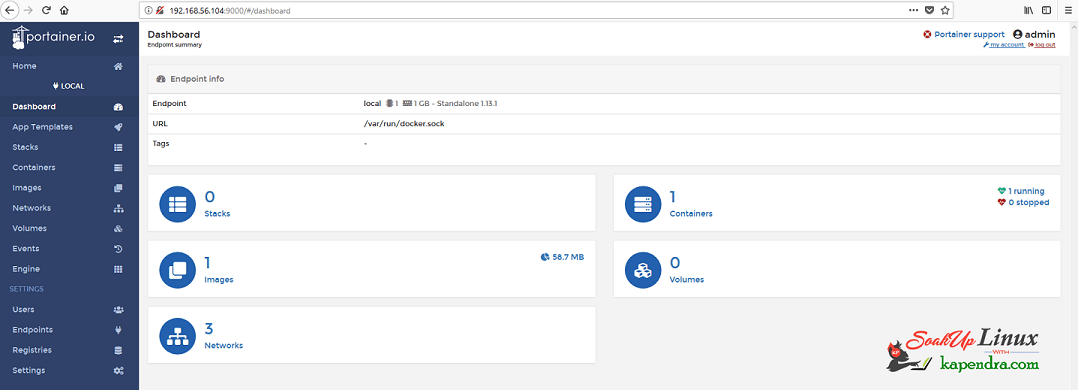
Step 5: Access Dashboard
After clicking on connect you will be sent to home page .Then click on local or Visit URL http://192.168.56.104:9000/#/dashboard
Note: Change IP as per your setup
This page has default section has a summary of the number of containers, docker version, volumes, networks etc.
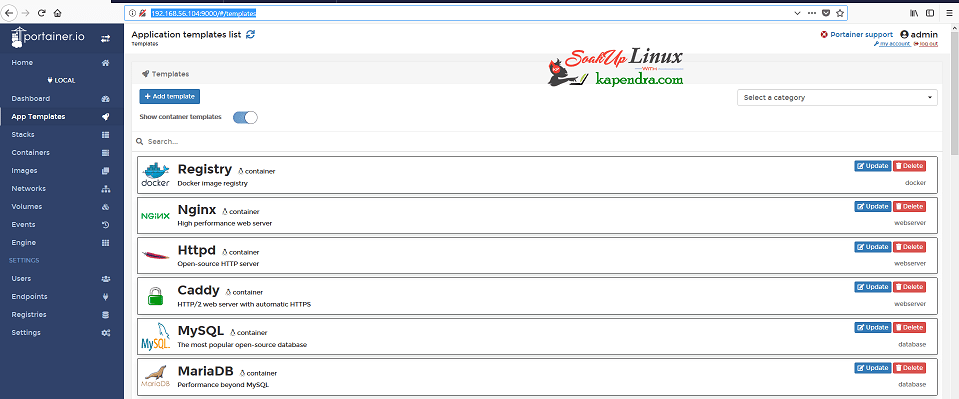
Explore Templates
Well you need time to explore this application and it has lots of tabs and functionality to know.
I eventually would suggest you to visit http://192.168.56.104:9000/#/templates . This section helps you to deploy of applications on Docker containers easy by providing several templates ready to use.
This bring us to the end of this article. Keep tunes and keep learning.
This bring us to the end of this article. Keep tunes and keep learning.

