Contact Us
How To Setup SAMBA Server Share On RHEL/CentOS 6/7 For Linux/Windows Hosts
Before Getting Start, Know About SAMBA
Well, when it comes to file sharing between windows user or Linux user or file sharing for Linux -Linux user then SAMBA comes into the picture. Samba is a free/open source and popularly used for the same work of file sharing and printing services between Unix-like systems including Linux and Windows host.
In this article, we will setup Samba4 for file sharing for Linux and Windows hosts machines. Also, we will learn password protected mode i.e secure mode and anonymous (unsecured) for SAMBA.
Scenario:
Host OS: CentOS/RHEL 6/7
Host IP: 192.168.1.19
RAM: 4GB Memory
Note: If you are a SUDO user then prefix every command with sudo, like #sudo ifconfig
Let’s Start
STEP 1: Install Samba Packages
To install required packages and dependencies to set up use the following yum command
[root@git ~]# yum install samba samba-client samba-common -y
STEP 2: Adding Exception For SAMBA In Firewall
This is a requirement when you have a running firewall so if you are not running firewall-cmd then you may skip this step else add samba service in the firewall.
[root@git ~]# firewall-cmd --permanent --zone=public --add-service=samba
success
[root@git ~]# firewall-cmd --permanent --add-port=137/tcp
success
[root@git ~]# firewall-cmd --permanent --add-port=138/tcp
success
[root@git ~]# firewall-cmd --permanent --add-port=139/tcp
success
[root@git ~]# firewall-cmd --permanent --add-port=445/tcp
success
[root@git ~]# firewall-cmd --permanent --add-port=901/tcp
success
[root@git ~]# firewall-cmd --reload
success
STEP 3: Getting Windows Host Work Group
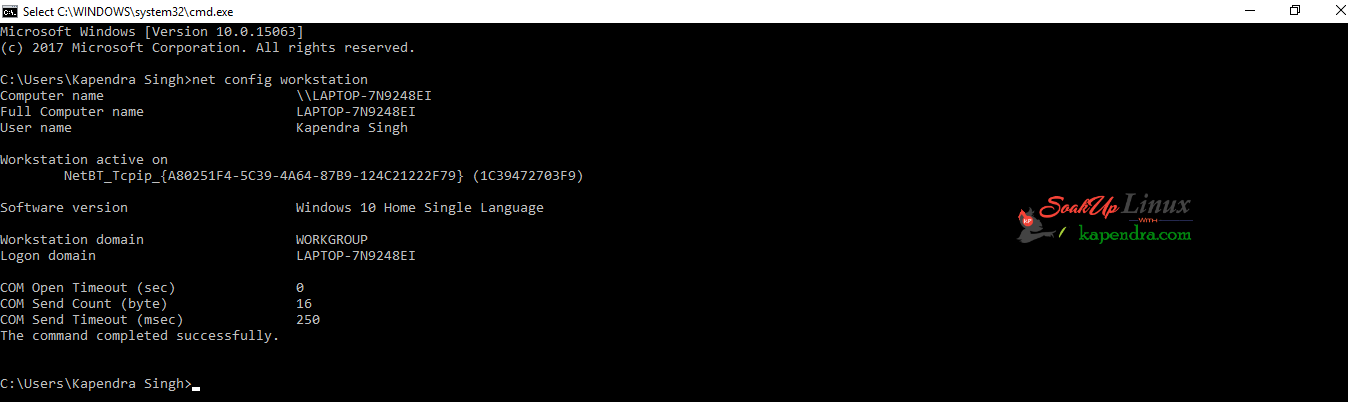
Well, to create a configuration for windows hosts we need to get the windows Machine “Workgroup” settings. So, log into your windows machine and hit the Following commands
>net config workstation
STEP 4: Creating SAMBA Share Directory
Before configuring samba take a backup for default SAMBA configuration file “/etc/samba/smb.conf” by the following command
[root@git ~]# cp /etc/samba/smb.conf /etc/samba/smb.conf.bak
To use a shared directory without any password i.e. non-secured use the following command to create a shared directory with appropriate permission.
[root@git ~]# mkdir -p /var/samba/all
[root@git ~]# chmod -R 0775 /var/samba/all
[root@git ~]# chown -R nobody:nobody /var/samba/all
Also, if you have SELinux enabled then set up the context for the samba and turn the samba_enable_home_dirs Boolean on if you want to share home directories via Samba.
[root@git ~]# chcon -t samba_share_t /var/samba/all
[root@git ~]# setsebool -P samba_enable_home_dirs on
STEP 5: Configuring SAMBA Secure And Non-Secure Shares
Here in this step, we will step up both secure and non-secure samba share so firstly let’s start with configuring non-secure samba share.
5.1-Configuring SAMA NON- SECURE
To set up non-secure samba share follow 3 simple steps and you are done.
- Now edit the samba configuration file and append given configuration.
[root@git ~]# vim /etc/samba/smb.conf
- Now, append the following line in this configuration file
[global]
 dos charset = CP932
 server string = Samba Server Version %v
 workgroup = WORKGROUP
 netbios name = SAMBA Server
 security = user
 map to guest = Bad User
 log file = /var/log/samba/log.%m
 max log size = 50
 server max protocol = SMB2
 idmap config * : backend = tdb
 hosts allow = 127., 192.168.1.
 cups options = raw
 [all]
 comment = File Sharing Server For All
 path = /var/samba/all
 browsable =yes
 writable = yes
 guest ok = yes
 create mask = 0777
 directory mask = 0777
 guest only = Yes
 read only = no
 force user = nobody
save and quit using ESC :wq! . Well you may verify the configuration with given command and if you find any issue fix that issue and proceed
[root@git ~]# testparm
3. The final step in this section is to restart the service and enabling samba to start up automatically after any reboot.
[root@git ~]# systemctl enable smb.service
[root@git ~]# systemctl start nmb.service
[root@git ~]# systemctl start smb.service
[root@git ~]# systemctl start nmb.service
You may check status of the running service by these commands
[root@git ~]# systemctl status smb.service
[root@git ~]# systemctl status nmb.service
Note: We Will test our work in step 6 and if you want to test it right now then you may move to step 6 right now.
5.2-Configuring SECURE SAMBA Share
To set up secure samba share follow 4 simple steps and you are done.
1. Create a group for the authorized users e.g. sambauser system group, and then add users to the group and set a password for each user.
[root@git ~]# groupadd sambauser
[root@git ~]# usermod kapendra -aG sambauser
[root@git ~]# smbpasswd -a kapendra
2. Now create the directory in /var/samba to mentioned in samba secure configuration. Also, setup permissions and SELinux context as well using following commands.
[root@git ~]# mkdir -p /var/samba/secure
[root@git ~]# chmod -R 0770 /var/samba/secure
[root@git ~]# chown -R root:sambauser /var/samba/secure
[root@git ~]# chcon -t samba_share_t /var/samba/secure
3. Now, append the following line in samba configuration to make it available for accessing files by editing smb.conf
[root@git ~]# vim /etc/samba/smb.conf
Now, append the following line in this configuration file
[Secure]
comment = Secure File Server Share
path = /var/samba/secure
valid users = @sambauser
guest ok = no
writable = yes
browsable = yes
save and quit using ESC :wq! . Well you may verify the configuration with given command and if you find any issue fix that issue and proceed
[root@git ~]# testparm
4. Now, restart the service to make the changes in effect.
[root@git ~]# systemctl restart smb.service
[root@git ~]# systemctl restart nmb.service
STEP 6: Verifying Your Work
Well, we have done configuration for secured and non-secured samba share. Now, we need to check these configurations. So again, you need to login into your window host and follow some simple steps. Firstly, we will check the non-secure samba share.
6.1 Test Non-Secure Samba File Sharing
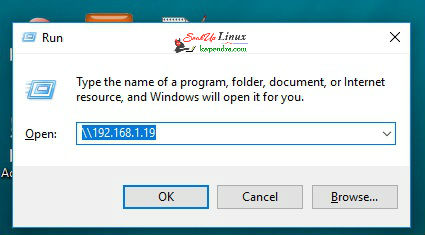
1. First Login to your windows host and try to access the samba server using its IP address
e.g. \\192.168.1.19
 2. Now you will see directories by name ALL(i.e. Non Secure Samba Share) and Secure(i.e. Secures Samba share). Click on ALL to access content and any user may create or delete content in this non-secure share.
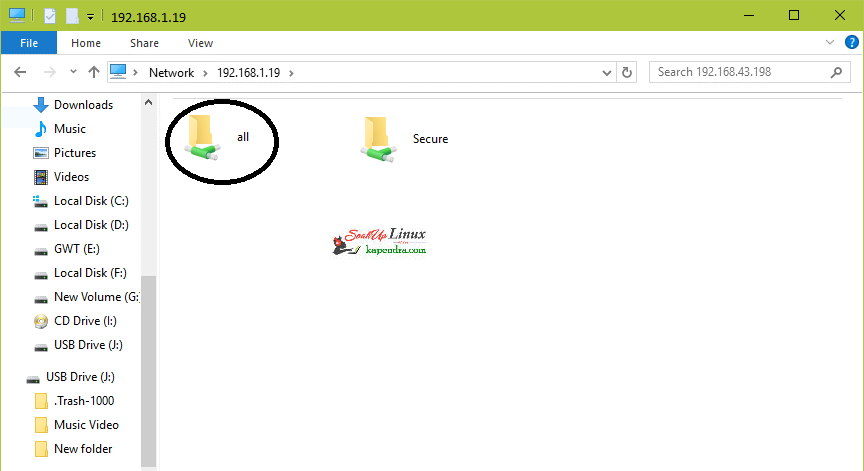 So after clicking on this ALL dir you will be able to create your stuff and anyone may add up content.
6.2 Test secure Samba File Sharing
1. First Login to your windows host and try to access the samba server using its IP address
e.g. \\192.168.1.19
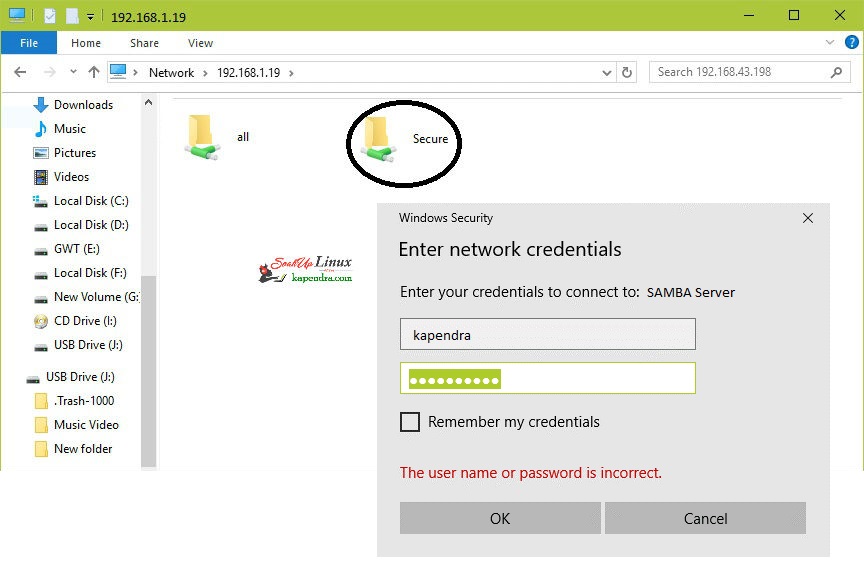
2. Now you will see directories by name ALL(i.e. Non Secure Samba Share) and Secure(i.e. Secures Samba share). Click on Secure to access content, only authorized user may create or delete content in this secure share.
Now here is the change, in secure samba share you will be prompted for username and password to login your samba server. So, click ok after entering credentials.
Once you are logged in, you will we able to see all see all the samba shared directories.
NOTE:- Though you see all samba shared directories you will be able to access only those directories to which you are authorized to see.
Read About Access SAMBA Share on Linux In Next Article


Trending now